Trim 1/4 inch from the stitching line.
Press all of the triangles back.
The center square is done. Not too hard so far.
Next we are going to create some flying geese blocks. We will be using a method that creates very little waste.
Lay two (print 2) 3 1/2 inch squares on opposite corners of a 6 1/2 inch (print 3) square as in the photo below. Make sure the right sides of the fabric are together.
One corner of the two small squares will overlap each other slightly.
Draw a diagonal line through both squares. Sew 1/4 inch on both sides of the line. Cut apart on the line.
Press toward the smaller triangles.
Place a (print 2) 3 1/2 inch square on the large corner of each of the resulting pieces with the right sides facing.
As seen above, draw a diagonal line through the square and sew 1/4 inch on each side of the line.
Cut apart on the line.
Press the triangles back and wa la! Four flying geese.
It is important to square them up to 3" x 5 1/2". Quilt in a Day makes a 2 1/2" x 5" (finished size) flying geese ruler which is very handy. If you do not have access to one make sure you leave 1/4 inch from the tip of the geese to the edge of the block. This will help avoid having flat nosed geese when you sew the blocks together.
Repeat the process using a 6 1/2 inch background block and four (print 3) 3 1/2 inch squares.
You now have all of the components to complete a block. Lay the pieces out as in the photo below. Sew them together one row at a time. If you press the seams in opposite directions from row to row it will make it easier to line up the seams perfectly.
Repeat the process to create a total of nine blocks. Keep in mind that prints 1,2 and 3 will be different in each block.
Arrange the blocks in three rows with three blocks in each row. Sew a 15 1/2" sashing strip between each block in the rows and on the end of each row.
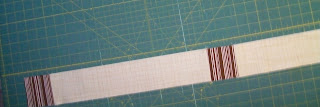
Sew 3) 15 1/2" sashing strips between 4 brown stripe squares.
To create the final borders sew a brown stripe square to each end of the 10 1/2" sashing strips. Sew a 3" background square between 3 of these units and to each end. Create four of these rows.
Sew one of these strips to each side of the quilt, being careful to match the seams.
Sew a brown stripe square to both ends of the remaining two strip sets.
Sew one to the top and bottom of the quilt.
It was a particularly busy month, so I didn't have time to get it quilted. I am really pleased with the way it turned out though. If you like a longer quilt, you could easily add borders to the top and bottom. In fact, I think I will. And scallop them.
Thanks so much for participating in our mystery quilt program. Please tell your friends about it!
Here are some of the fabrics we will be using for the July mystery quilt.
Give us a call to sign up. 801-465-9133 Happy Quilting!


