Pages

Tuesday, December 18, 2012

December Mystery Quilt


Giddy Up in Gingham  

(About 56 x 64 inches of pure cuteness)
Christmas is almost here!  We are so not ready - give me one more week please!
I am happy with the way this month's mystery quilt turned out.  It kind of evovled (as some of them do) from what I originally had in mind.
Here's what you do.
Sew a pink gingham triangle to opposite sides of a bandana square. 


Trim the excess points even with the edge of the square. 
 

 Sew triangles to the remaining two sides. Square the resulting block to 8 ½ inches. Repeat to create 28 blocks.


The star blocks will take two rectangles each of a background, a brown print and a colored print.


 Match a background rectangle to a brown print and one to a color print. Match a brown print to the other color print. 


 Draw a diagonal line from the top left corner to the bottom middle and another from the top right corner to the bottom middle.


Cut in half vertically and on the drawn lines. 


Square each half square triangle to 2 ½ inches and press open. 

 
Using four 2 ½ inch background squares and the half square triangles created above, arrange as diagramed to complete a star block. 
 
 
Here is a photo of the finished block.
 
Repeat the process using various prints with the browns and background to create a total of 28 star blocks.  The blocks should measure 8 ½ inches.


Sew the blocks together alternating the stars with the bandana squares. 


You will need 7 rows with eight blocks in each row.


Optional:  To enlarge the quilt, add a 2 ½ inch first border followed by a 6 ½ inch final border.  (Finishes about 72 x 80 inches.)   

Quilt as desired.  Bind and enjoy!


The fabrics pictured below are the ones planned for January's mystery quilt.


We want to thank you for your support and friendship.
 
Have a very Merry Christmas and a happy New Year!
 

Saturday, December 8, 2012

We are grateful to have a Veterans Home being built right here in our little town of Payson.  It is nearing completion and is scheduled to open on Memorial day 2013.  It will be a 108 bed facility.  A similar facility is being built in southern Utah as well so there is a need for plenty of quilts.

A fabulous group of ladies here in town are spearheading a campaign to provide home-made quilts in shades of red, white and blue for each of the beds.  The quilts can be dropped off at our store or other participating locations.  More info is available here at the shop.  Please stop in or give us a call at 801-465-9133.

To help with the cause we are offering a free download of one of Becky's most popular patterns - Freedom Flags.


This is a fun and quick quilt to make.  Please click on the link below to download the instructions and help the cause!

Thanks in advance.

Click here for your free download of Freedom Flags


Tuesday, November 27, 2012

Granny's Vintage Squares

This was a fun quilt to do.  I love the vintage feel.  A friend of ours has recently done several quilts with granny square blocks.  You can check out her versions at myquiltdiet.blogspot.com.  As we were considering what to do with the fabrics we had selected for this month's mystery we remembered her quilts.  Thanks for the inspiration Marion!


Arrange the 2 1/2 inch squares as shown below.  You will use four different fabrics (including the background fabric) in each of the blocks.   Vary the fabrics from block to block.


Sew the squares together into rows.  Press the seams in opposite directions from row to row.  Sew the rows together to form the block.  Create 20 blocks.


Square the blocks.  Make sure to leave at least 1/4 inch seam allowance so the points of the squares are not cut off when the sashing is added.  We squared our blocks to nine inches.  Your's may vary depending upon your sewing methods.  Not to worry.  Square them up as large as you can.  Make sure to adjust the sashing length to match the block size.


You will need to create 20 granny square blocks.  Arrange the blocks into five rows with four blocks in each row.  (We took the photo before all of the blocks were finished but you get the idea.)


Sew a 2 1/2 by nine inch sashing strip between each of the blocks in the row.  (If your blocks are not nine inches, adjust the sashing strip accordingly.) 


Sew a 2 1/2 inch background strip between each of the rows.

Sew a 2 1/2 inch background all around the quilt.

Sew a 2 inch strip of the strawberry striped fabric to all four sides.

Finsh with a 2 1/2 inch background strip sewn around the entire quilt.


Quilt as desired.  Bind and enjoy!

Thanks so much for participating in our mystery quilt program.  Please tell all your friends - we would love to increase our numbers.  For those who may not live close enough to pick up the kits at the shop we will be happy to ship.  The kits will fit in a flat rate envelope which we can ship for only $6.00.

Here is a peek at December mystery quilt fabrics.  We will move the December date up one week to Dec. 18th because I'm sure you don't want to visit us on Christmas Day.


Tuesday, October 30, 2012


Tumbling Along


This month's mystery quilt is quick and fun.  We did two baby size versions using only four blocks in a couple of hours this morning before we opened up the shop. 

Let's get started.

Sew a 1 ½ x 6 ½ inch green strip between a 6 ½  inch square and a 6 ½ x 9 ½ inch rectangle.  Repeat for all 12 blocks.


Sew a 1 ½ x 9 ½ inch green strip between a 9 ½ inch square and a 6 ½ x 9 ½ inch rectangle.  Repeat for 12 blocks.


Sew a 1 ½ x 16 ½ inch strip in between the two units created above.  Repeat to create 12 blocks.

 
Sew a 1 ½ x 16 ½ inch sashing strip between three blocks to form a row.  Turn each block ¼ turn from the previous block. 

 
Create four rows with three blocks in each.  Sew a 1 ½ inch green strip between each row.  Sew a 1 ½ inch green strip all around the quilt.  Follow with the 3 inch final border. 

(The colors are not quite right in the photo below but you get the idea.) 


Quilt as desired.  Bind and enjoy!
Here are the fabrics for November's mystery quilt.  There will be some cream/off white background fabric as well.


Call us at 801-465-9133 if you would like to sign up.

Happy Quilting! 


Saturday, October 20, 2012

Sorry - we've not been very good at posting the block party blocks.

For those of you who like to see what you are making here is today's block (Crossroads).


And here is last session (Reflections).


Hope they help!

Friday, October 19, 2012

Candlestick holder


We were getting ready for our annual Shop Hop last week and I needed a large candlestick holder to finish the display for our pumpkin table topper.  I've had this idea in mind for a while that I decided to give a try.  It was a fun project and I am very happy with the results.

All you need is a plate, a sundae cup, glue and spray paint.  (Make sure the Sundae cup has a flat edge, not fluted so you can get a good bond when it is glued to the plate.)


Simply center the Sundae cup on the back of the plate.  Draw around the cup with a permanent marker.  Run a bead of glue (we used goop craft glue) just inside the mark and another around the rim of the Sundae cup.  Allow the glue to set for a minute or two and then press the plate and sundae cup together.  Allow to set for 24 hours and spray paint. 

Easy, and fun! 


We did a bunch of kits for the table topper.  They sold out the first day of shop hop.  We will be doing more kits so if you would like one give us a call (801-465-9133).  It makes the candles look really nice - don't you think?

If you would like to win a pumpkin topper kit send us your comments.  We'll pick a winner sometime next week. 

You still have a day and a half to join us for shop hop.   Come see us.

Wednesday, October 3, 2012

Thanks to all for participating in the Springtime in the Rockies blog tour. 

The winner of the free book from our site is Lorie who posted a comment on Sept 25.  Congratulations!

Please let us know where to send your book.

Thanks,
Stitches & Sew Forth

Monday, October 1, 2012

We're having a quilt sale!


We were going through all the trunks of quilts the other day.  We started thinking - what are we going to do with all of these quilts?  As most of you will relate, it's hard to part with some of these hand made creations.  But, alas, the bills have to be paid. 

View below to see 12 wonderful quilts that we have decided to part with.  Please give us a call if you see anything of interest to you.  All of the quilts are new.  They have been used as displays at the shop so each reflects a discount.


Window Panes
SOLD
about 70 1/2 x 80 1/2
Reg. Price $250.00
Sale price $200.00


Window Panes quilting


Posy Farm  
Sold
about 54 x 78
Reg. $212.00
Sale $196.60


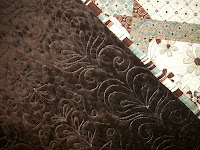
Posy Farm quilting


Posy Farm Backing


Lazy Daisy Quilt
about 72 1/2 x 90
Reg. $371.00
Sale $296.80


Lazy Daisy quilting

Lazy Daisy back


Key Lime Cheesecake
Sold!
about 71 x 94
Reg. $350.00
Sale $280.00

Key Lime quilting


Key Lime backing 


Tipsy Tulips
Sold
about 63 x 70
Reg. $200.00
Sale $160.00


Tipsy Tulips quilting


Tipsy Tulips backing


Pieces from the Past
 about 99 x 99
Reg. $ 900.00
Sale $810.00


Pieces from the Past quilting


Pieces from the Past backing


Pretty Packages 
SOLD
about 61 x 71
Reg. $200.00
Sale $160.00


Pretty Packages quilting


Pretty Packages flannel backing


Whirligigs
SOLD
about 64 x 51 1/2
Reg. $200.00
Sale $160.00


Whirligigs quilting


Whirligigs scrap pieced backing


Cris Cross Connections 
SOLD
about 56 x 66
reg. $175.00
Sale $140.00


Cris Cross Connections quilting


Cris Cross Connections minky backing


Halloween topper/wall hanging
 
SOLD
about 51 x 51
Reg. $160.00
Sale $128.00.


Double Wedding Ring
SOLD
about 67 x 79
Reg. $700.00
Sale $630.00


Double Wedding Ring heirloom quilting


Double Wedding Ring backing


Daisy Chain   
 SOLD
about 60 x 72
Reg. $225.00
Sale $202.50

Daisy Chain backing


Please pass the word on to your non-quilting friends.
Have a great day!